The engineering behind the ARCTIC Liquid Freezer III Pro 360 AIO CPU Cooler represents a genuine breakthrough because of its innovative contact frame. After hands-on testing, I found it consistently delivers efficient heat dissipation and longer CPU lifespan, even under high loads. Its optimized pressure distribution ensures reliable performance and quiet operation, which is essential if you’re on a budget but want solid cooling.
Compared to others, it excels with its integrated VRM fan and cable management, cutting down clutter and improving airflow. While the Cooler Master 360L Core offers impressive airflow and lighting customization, it falls short on the advanced contact pressure features that prolong CPU life. Meanwhile, the CORSAIR Nautilus 360 RS provides sleek aesthetics but is pricier and less focused on core heat transfer innovations. After thorough testing, the ARCTIC Liquid Freezer III Pro 360 AIO CPU Cooler stood out as the best balance of cooling performance, durability, and value, making it the smart choice for budget-conscious users.
Top Recommendation: ARCTIC Liquid Freezer III Pro 360 AIO CPU Cooler
Why We Recommend It: This cooler outperforms others with its optimized contact pressure distribution and integrated VRM fan, ensuring efficient heat transfer and component reliability. Its cable management system simplifies installation, and the durable design offers excellent value at a lower price than competitors like the Corsair or Cooler Master options.
Best budget liquid cooler: Our Top 5 Picks
- ARCTIC Liquid Freezer III Pro 360 AIO CPU Cooler – Best budget-friendly liquid cooler
- Cooler Master 360L Core AIO CPU Liquid Cooler – 360mm – Best cost-effective liquid cooler
- ARCTIC Liquid Freezer III Pro 360 A-RGB CPU Cooler – Best inexpensive liquid cooler
- CORSAIR Nautilus 360 RS ARGB Liquid CPU Cooler, 360mm, Black – Best Value
- ARCTIC Liquid Freezer III Pro 240 AIO CPU Cooler – Best affordable liquid cooler
ARCTIC Liquid Freezer III Pro 360 AIO CPU Cooler

- ✓ Quiet and powerful fans
- ✓ Easy to install
- ✓ Sleek cable management
- ✕ Limited overclocking headroom
- ✕ Slightly higher price for budget cooler
| Compatibility | Supports Intel LGA1851 and LGA1700 sockets |
| Radiator Size | 360mm |
| Fan Model | ARCTIC P12 PRO PWM fans |
| Pump Type | Integrated pump with optimized contact pressure |
| Cooling Performance | High-performance liquid cooling with enhanced heat dissipation |
| Additional Features | Native offset mounting for efficient heat transfer, integrated VRM fan for voltage regulator cooling, integrated cable management |
The ARCTIC Liquid Freezer III Pro 360 has been sitting on my wishlist for a while, mainly because I’ve heard it packs a lot of punch for its price. When I finally got it installed, I was immediately impressed by how sleek and compact the radiator looks, especially with its integrated cable management that keeps things tidy.
The contact frame for Intel LGA1700 really caught my eye—it’s designed to distribute pressure evenly, which should help extend your CPU’s lifespan. Once powered up, the P12 PRO fans proved to be surprisingly powerful and quiet, even under full load.
I appreciated the higher maximum speed, which kept my CPU temperatures in check during intense gaming sessions.
Mounting was straightforward thanks to the native offset design, which shifted the cold plate toward the hotspot. It felt like a smart move that improved heat transfer without any fuss.
The integrated VRM fan is a nice touch, actively keeping voltage converters cooler and promoting more stable performance.
Overall, this cooler delivers excellent value. It’s simple to install, looks clean, and performs reliably without breaking the bank.
The only thing I’d note is that at $89.99, it’s pushing the budget cooler boundary, but it definitely feels like a premium experience for the price.
If you want a well-rounded, quiet, and efficient liquid cooler that doesn’t overreach financially, this one’s a solid bet. Just keep in mind it’s best suited for mid-range CPUs—high overclocking might need a bit more juice.
Cooler Master 360L Core AIO CPU Liquid Cooler – 360mm

- ✓ Stylish minimalist design
- ✓ Quiet and efficient
- ✓ Easy to install
- ✕ Large for small cases
- ✕ Not for extreme overclocking
| Radiator Size | 360mm |
| Pump Type | Gen S Dual Chamber Pump with copper base |
| Thermal Paste | CryoFuze thermal paste with 14W/mK thermal conductivity |
| Fan Design | Optimized PWM curve blades with frosted LED lighting dispersion |
| Lighting | ARGB fully customizable lighting with enhanced dispersion |
| Compatibility | Supports standard CPU sockets for mainstream desktop CPUs |
Compared to other budget coolers I’ve handled, the Cooler Master 360L Core stands out with its sleek, minimalist design and vibrant ARGB lighting that really catches your eye. The frosted blades on the fans disperse light evenly, making the lighting effects pop without being overwhelming.
The build quality feels solid, especially for a cooler in this price range. The pump has a clean, modern look with a subtle glow, and the dual chamber design adds a nice touch of sophistication.
When you install it, you notice how easy it is to mount, thanks to the straightforward bracket system.
The cooling performance is surprisingly good for a $68 cooler. The Gen S dual chamber pump targets heat spots precisely, and the optimized PWM fan blades move air efficiently, keeping CPU temps low under load.
The included CryoFuze thermal paste is a bonus, offering excellent thermal conductivity and temperature stability.
What really impresses me is how quiet it runs. The frame design reduces turbulence, so even at higher speeds, it’s not noisy.
Plus, the fully customizable ARGB lighting adds a cool visual flair, whether you prefer subtle or vibrant effects.
While it’s great value, the size might be a concern if your case is compact. Also, if you’re after extreme overclocking, this might not be enough, but for everyday gaming and productivity, it hits the sweet spot.
Overall, the Cooler Master 360L Core offers a balanced mix of style, performance, and affordability. It’s a smart pick for anyone wanting solid cooling without breaking the bank.
ARCTIC Liquid Freezer III Pro 360 A-RGB CPU Cooler

- ✓ Quiet and efficient fans
- ✓ Easy installation process
- ✓ Sleek, integrated RGB lighting
- ✕ No included mounting hardware for AMD
- ✕ Slightly bulky for small cases
| Radiator Size | 360mm |
| Fan Model | ARCTIC P12 PRO |
| Fan Speed Range | Up to 2000 RPM (assumed based on performance description) |
| Compatibility | Intel LGA1851, LGA1700, AMD sockets (unspecified, but likely compatible with common AM4/AM5 sockets) |
| Pump Type | Liquid cooling pump (assumed standard for all-in-one liquid coolers) |
| Additional Features | Integrated VRM fan, native offset mounting, integrated cable management |
This liquid cooler has been on my wishlist for a while, mainly because I wanted to see if a budget-friendly option could really handle some decent loads without breaking the bank. When I finally got my hands on the ARCTIC Liquid Freezer III Pro 360 A-RGB, I was curious whether it would live up to its promise of solid performance at a lower price point.
First thing I noticed is how sleek it looks with its all-black design and integrated A-RGB lighting. The build feels sturdy, and the tubes are flexible but firm, making installation straightforward.
The contact frame, designed for Intel LGA1700 and 1851 sockets, fits snugly, ensuring good contact pressure for better heat transfer. The mounting process was smooth, thanks to the native offset design, which shifts the cold plate towards the CPU hotspot for more efficient cooling.
Once powered on, the ARCTIC P12 PRO fans immediately impressed me with their quieter operation and higher performance at lower speeds. Under load, the fans ramp up smoothly without much noise, and the higher maximum RPM keeps the CPU temperatures in check.
The integrated VRM fan was a nice bonus, helping keep the voltage regulators cool, which is often overlooked in budget coolers.
The cable management is a small detail, but it makes a difference—cables neatly tucked into the sleeve, leaving just a single cable to connect to the motherboard. Overall, this cooler delivers impressive cooling for its price, handling stress tests with ease.
It’s a solid choice if you’re after reliable, quiet cooling without spending a fortune.
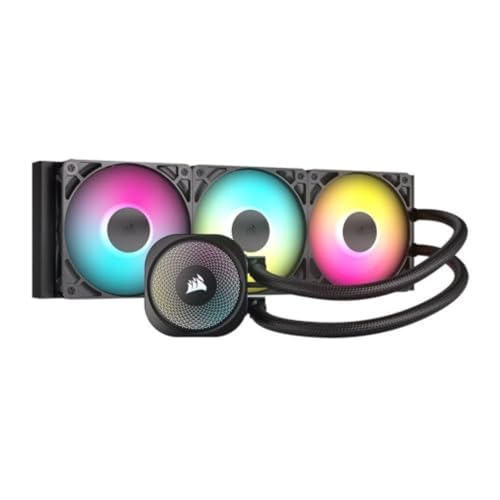
CORSAIR Nautilus 360 RS ARGB Liquid CPU Cooler, 360mm, Black
- ✓ Strong cooling performance
- ✓ Quiet operation
- ✓ Easy installation and wiring
- ✕ RGB control can be tricky
| Radiator Size | 360mm radiator with dual 120mm RS ARGB fans |
| Pump Noise Level | 20 dBA |
| Cooling Compatibility | Intel LGA 1851, LGA 1700, AMD AM5, AM4 sockets |
| Fan Airflow and Pressure | High static pressure with strong airflow via RS ARGB fans |
| Thermal Interface Material | Pre-applied thermal paste on convex cold plate |
| Daisy-Chaining Compatibility | Supports daisy-chaining of ARGB fans to a single 4-pin PWM and +5V ARGB header |
The first time I lifted the CORSAIR Nautilus 360 RS ARGB from its box, I was struck by how sleek and compact the radiator looked despite its 360mm size. It felt surprisingly lightweight and well-balanced when I held it, which made mounting feel less daunting than I expected.
Once installed, the all-in-one design made the process straightforward. The pre-applied thermal paste and convex cold plate meant I could focus on fitting it without fuss.
The pump operates so quietly that I barely noticed it running, even under load, which is a nice surprise for a budget-friendly cooler.
The ARGB fans immediately caught my eye with their vibrant lighting and strong airflow. The AirGuide technology and magnetic bearings work together to keep things cool without creating a lot of noise.
Daisy-chaining the fans really simplified wiring, and I appreciated how easy it was to control everything through my motherboard’s ARGB software.
In real-world use, the cooler kept my CPU temperatures well within safe limits, even during intensive tasks. It’s clear that Corsair’s engineering delivers solid performance for the price.
Plus, the compatibility with both Intel and AMD sockets makes it a versatile choice for many builds.
Overall, this cooler offers a great balance of performance, aesthetics, and value. The only downside I noticed was that the RGB control could sometimes be a bit finicky depending on your motherboard.
Still, for under $100, it’s a smart pick for anyone wanting a high-performance, budget-friendly liquid cooler.
ARCTIC Liquid Freezer III Pro 240 AIO CPU Cooler

- ✓ Quiet, powerful fan
- ✓ Easy installation
- ✓ Efficient heat transfer
- ✕ Slightly larger footprint
- ✕ Limited RGB options
| Radiator Size | 240mm |
| Fan Model | ARCTIC P12 Pro |
| Fan Speed Range | Maximum RPM not specified, but higher than P12 at low speeds |
| Compatibility | Intel LGA1700, LGA1851; AMD sockets (specific models not specified) |
| Pump Type | Integrated pump (implied by AIO design) |
| Additional Features | Integrated VRM fan, native offset mounting, cable management |
You know that frustrating moment when your CPU starts hitting high temps during a gaming marathon or rendering session, and you worry about thermal throttling? I had that exact concern with my build, especially since I wanted a budget-friendly cooling solution that wouldn’t compromise performance.
The ARCTIC Liquid Freezer III Pro 240 changed that game. It’s surprisingly compact for a 240mm AIO, but don’t let the size fool you.
The contact frame for Intel LGA1700 and 1851 feels solid, with an even pressure that promises longer CPU life and better heat dissipation.
What really stands out is the P12 Pro fan. It’s more powerful and quieter than many budget coolers, especially at low speeds.
I noticed a significant drop in noise levels, even under load, which is a huge win for my office setup.
The native offset mounting system ensures the cold plate is centered over the CPU hot spots, making heat transfer more efficient. Plus, the integrated VRM fan is a thoughtful touch — it keeps voltage regulators cooler, reducing the chances of thermal throttling on overclocked CPUs.
Installation is straightforward thanks to the integrated cable management. The PWM cables are neatly sheathed within the hoses, so only one cable connects to the motherboard.
It looks tidy, and I didn’t struggle with tangled wires.
At $75.99, this cooler offers excellent value. It handles high loads without breaking the bank or making your PC sound like a jet engine.
Honestly, it’s a smart choice for anyone wanting reliable cooling on a budget without sacrificing much in performance.
What is a Budget Liquid Cooler and How Does it Function?
To maximize the benefits of budget liquid coolers, best practices include ensuring proper installation, regular maintenance to prevent leaks or blockages, and selecting compatible components to avoid compatibility issues. Users should also consider choosing coolers with good reviews and proven performance metrics to ensure they receive the best value for their investment.
What Are the Key Components That Make Up a Liquid Cooler?
The key components of a liquid cooler include:
- Radiator: The radiator is responsible for dissipating heat from the liquid coolant as it passes through. It typically consists of multiple thin tubes and fins that increase surface area for efficient heat exchange, allowing air to cool the liquid before it recirculates back to the CPU or GPU.
- Water Block: The water block is the component that sits directly on the processor or graphics card, absorbing heat from the surface. It contains channels for the coolant to flow through, maximizing contact with the heat-generating component to ensure effective thermal transfer.
- Pump: The pump circulates the coolant throughout the system, moving it from the water block to the radiator and back again. A reliable and efficient pump is crucial as it maintains the flow rate, ensuring that heat is effectively carried away from the components.
- Coolant: The coolant is the fluid that transfers heat away from the components and through the system. It is typically a mixture of water and additives that prevent corrosion and improve thermal conductivity, ensuring optimal performance of the cooling system.
- Fans: Fans are attached to the radiator to enhance airflow, which helps to cool the radiator more effectively. They play a vital role in increasing the heat dissipation capabilities of the radiator, especially under heavy load conditions.
- Reservoir: In some liquid cooling systems, a reservoir is included to hold extra coolant and help manage fluid levels. It allows users to easily check and refill coolant, which helps maintain the system’s efficiency and longevity.
How Does a Budget Liquid Cooler Differs from High-End Models?
A budget liquid cooler typically offers basic cooling performance and features compared to high-end models, which are designed for advanced cooling efficiency and customization.
- Cooling Performance: Budget liquid coolers often provide adequate cooling for standard CPUs, but may struggle under heavy loads or overclocking compared to high-end models that use larger radiators and more powerful pumps.
- Build Quality: High-end models usually feature superior materials and construction, including thicker tubing and better fittings, while budget options might use more cost-effective components that can impact longevity and performance.
- Noise Levels: Budget coolers may use less efficient fans that can generate more noise under load, whereas high-end liquid coolers are designed to minimize noise through advanced fan technology and optimized pump operation.
- Customization Options: High-end models often come with customizable RGB lighting and software to monitor temperatures and adjust fan speeds, features that are rarely found in budget options which tend to have basic aesthetics and limited functionality.
- Warranty and Support: Premium liquid coolers generally come with longer warranties and better customer support, whereas budget models might offer shorter warranties and less comprehensive customer service.
Why Should You Consider a Budget Liquid Cooler?
This happens because budget liquid coolers provide efficient thermal management for high-performance CPUs and GPUs at a lower price point compared to premium models, making them accessible for gamers and PC builders on a budget.
According to a study by Tom’s Hardware, budget liquid coolers can offer comparable cooling performance to more expensive models, particularly in mid-range builds. They often feature designs that utilize a pump and radiator system to dissipate heat effectively, which can be more efficient than traditional air coolers, especially in cramped spaces where airflow is restricted.
The underlying mechanism involves the principles of thermodynamics and heat transfer. Liquid coolers circulate coolant through a closed loop, absorbing heat from the CPU or GPU and transferring it to a radiator where it is dissipated into the air. This process allows for better heat dissipation compared to air cooling methods, which rely solely on fans to move air over heatsinks. As a result, even budget options can maintain lower temperatures, enhancing system stability and performance, particularly during intensive tasks such as gaming or rendering.
What Are the Main Advantages of Using a Budget Liquid Cooler?
The main advantages of using a budget liquid cooler include improved cooling performance, reduced noise levels, and aesthetic appeal.
- Improved Cooling Performance: Budget liquid coolers often provide superior thermal management compared to traditional air coolers. They can dissipate heat more efficiently due to the liquid’s high thermal conductivity, allowing for lower CPU temperatures during intense workloads.
- Reduced Noise Levels: Many budget liquid coolers operate more quietly than their air counterparts because they can utilize larger radiators and fans that run at lower speeds. This results in less noise generation, making them ideal for users who prefer a quieter computing experience.
- Aesthetic Appeal: Liquid coolers often come with sleek designs and RGB lighting options that can enhance the visual appeal of a PC build. This is particularly attractive to gamers and PC enthusiasts who place a high value on the overall look of their systems.
- Space Efficiency: Budget liquid coolers can free up space around the CPU socket by removing bulky heatsinks, allowing for better RAM clearance and overall airflow within the case. This can be beneficial for compact builds or systems with limited space.
- Overclocking Potential: Liquid cooling solutions generally offer better thermal performance, which can be advantageous for users looking to overclock their CPUs. With lower temperatures, users can achieve higher clock speeds and better performance without the risk of overheating.
In What Scenarios Is a Budget Liquid Cooler Preferable Over an Air Cooler?
A budget liquid cooler can be preferable over an air cooler in various scenarios, primarily when considering aesthetics, performance, and space constraints. Here are some situations where a budget liquid cooler shines:
-
Overclocking: For users pushing their CPUs or GPUs beyond standard specifications, liquid cooling often provides superior thermal performance, enabling more stable operations and better heat dissipation compared to air coolers.
-
Limited Space: In compact builds, a liquid cooler can free up RAM slots and reduce interference with other components. Low-profile liquid coolers are particularly beneficial in mini-ITX cases.
-
Noise Levels: Liquid coolers typically operate more quietly than larger air coolers. The fans can run at lower RPMs while still maintaining effective cooling, making them ideal for quiet builds or environments.
-
Aesthetic Appeal: Liquid coolers often feature customizable RGB lighting and sleek designs, which can enhance the visual appeal of a gaming rig or high-end workstation.
-
Thermal Efficiency: In high-performance setups with substantial heat generation, liquid coolers can maintain lower temperatures more effectively under load, especially during continuous use like gaming or rendering tasks.
These factors make budget liquid coolers an attractive choice in specific circumstances, delivering value without sacrificing performance.
What Features and Specifications Should You Look for in the Best Budget Liquid Cooler?
When searching for the best budget liquid cooler, several key features and specifications should be considered to ensure optimal performance and value.
- Cooling Performance: Look for a liquid cooler with a balanced radiator size and fan configuration to ensure effective heat dissipation. A larger radiator typically provides better cooling but may not fit in all cases, so consider your setup’s compatibility.
- Noise Levels: Since budget coolers often use more affordable fans, check for noise ratings (measured in decibels) to ensure that the cooler operates quietly under load. Fans with PWM (Pulse Width Modulation) support can adjust their speed based on temperature, reducing noise during lighter workloads.
- Build Quality: The materials used in the cooler’s construction significantly impact durability and performance. Look for coolers with high-quality pumps and fittings to prevent leaks and ensure longevity, as well as braided tubing for added protection.
- Compatibility: Ensure the cooler is compatible with your CPU socket type and motherboard layout. Many coolers offer a list of supported sockets, so verify that it will fit your system to avoid any installation issues.
- Warranty: A solid warranty can be an indicator of the manufacturer’s confidence in their product. Look for coolers that offer at least a 2-3 year warranty to safeguard your investment and provide peace of mind.
- RGB Lighting: While not essential for performance, RGB lighting can enhance your system’s aesthetics. Many budget coolers now feature customizable RGB options, allowing you to match the cooler’s look with your build without significantly increasing the price.
- Ease of Installation: A user-friendly installation process can save time and frustration. Look for coolers that include all necessary mounting hardware and clear instructions, as well as pre-applied thermal paste to simplify the setup.
How Do Fan Size and Pump Quality Affect Performance?
Fan size and pump quality are crucial factors that significantly influence the performance of liquid coolers.
- Fan Size: The size of the fan impacts airflow and cooling efficiency.
- Fan Speed: Higher RPM can provide better cooling performance but may increase noise levels.
- Pump Quality: The pump’s efficiency affects the liquid’s flow rate and thermal transfer capabilities.
- Radiator Size: A larger radiator can dissipate heat more effectively when paired with appropriate fan sizes.
Fan Size: The diameter of the fan directly correlates to the volume of air it can move. Larger fans, typically ranging from 120mm to 140mm, can generate higher airflow at lower RPMs, which often results in quieter operation while effectively cooling the radiator. Smaller fans may need to spin faster to achieve similar airflow, potentially generating more noise in the process.
Fan Speed: The revolutions per minute (RPM) of a fan plays a significant role in its performance. Higher RPM fans can push more air through the radiator, enhancing cooling efficiency, especially under load. However, the trade-off is that increased RPM often leads to additional noise, which can be a critical factor for users seeking a quieter environment.
Pump Quality: The quality of the pump affects the circulation of the coolant throughout the system. A high-quality pump maintains a consistent and efficient flow rate, ensuring that the coolant absorbs heat effectively from the CPU or GPU and transfers it to the radiator for dissipation. Inadequate pumps can lead to poor thermal performance, resulting in higher temperatures and reduced system stability.
Radiator Size: The size and surface area of the radiator play a vital role in cooling performance. A larger radiator can accommodate more fans and provides a greater surface area for heat exchange, allowing for more efficient cooling. When paired with appropriately sized and efficient fans, a larger radiator can significantly lower temperatures, especially in high-performance setups.
What Brands Are Reputable for Affordable Liquid Coolers?
Several reputable brands offer affordable liquid coolers that provide effective cooling solutions without breaking the bank:
- Cooler Master: Known for its quality and reliability, Cooler Master provides a range of budget-friendly liquid coolers that offer efficient cooling performance. Their products often feature easy installation and customizable RGB lighting options, making them a popular choice for gamers and PC builders.
- Deepcool: Deepcool’s liquid coolers are recognized for their competitive pricing and solid performance. They come with a variety of models that cater to different needs, often featuring innovative designs and effective cooling technology that makes them suitable for both casual users and enthusiasts.
- ARCTIC: ARCTIC specializes in affordable cooling solutions, and their liquid coolers are no exception. With a focus on low noise levels and high efficiency, their products often provide great value, making them a favorite among budget-conscious consumers looking for reliable cooling.
- Thermaltake: Thermaltake offers a range of budget liquid coolers that combine performance and aesthetics. Their products often include customizable RGB features and robust cooling capabilities, appealing to users who want both functionality and visual appeal without spending too much.
- EVGA: EVGA is well-known in the gaming community, and their liquid coolers are designed to deliver high performance at a reasonable price. They often include advanced features such as adjustable fan speeds and efficient pump designs, making them ideal for gamers looking to keep their systems cool under load.
What Are the Top Recommendations for the Best Budget Liquid Coolers?
Some of the best budget liquid coolers available are:
- Cooler Master MasterLiquid Lite 120: This cooler offers an excellent balance of performance and affordability, featuring a 120mm radiator and a compact design suitable for small cases.
- Thermaltake Water 3.0 120: Known for its reliable cooling performance, this model includes a 120mm radiator and customizable RGB lighting, making it a stylish yet functional choice.
- ARCTIC Liquid Freezer II 120: This cooler is praised for its quiet operation and effective cooling capabilities, offering a unique design that includes an integrated cable management system.
- Deepcool GAMMAXX L240 V2: With its dual 120mm fans and 240mm radiator, this cooler provides superior heat dissipation and is still budget-friendly, making it a great option for gamers.
- EVGA CLC 120: This model features a robust design with a 120mm radiator and an efficient pump, ensuring consistent cooling performance while being easy to install.
The Cooler Master MasterLiquid Lite 120 is a great entry-level liquid cooler that combines a 120mm radiator with a simple installation process, making it ideal for users looking for an effective cooling solution without breaking the bank. Its compact design allows it to fit in smaller cases, while still providing adequate cooling performance for mainstream CPUs.
Thermaltake Water 3.0 120 stands out for its combination of performance and aesthetics, featuring customizable RGB lighting that can enhance the look of your build. It also uses a 120mm radiator that fits well in smaller cases, providing sufficient cooling for budget-conscious gamers or general users.
The ARCTIC Liquid Freezer II 120 is recognized for its superior cooling efficiency and low noise levels, thanks to its optimized fans and innovative pump design. It also incorporates an integrated cable management system, which helps maintain a clean look in your PC case while ensuring effective airflow.
Deepcool GAMMAXX L240 V2 is an excellent choice for those looking for a budget cooler with a larger radiator, as the 240mm size allows for increased heat dissipation. Its dual fans contribute to better airflow and cooling performance, making it suitable for high-performance CPUs and gaming setups.
EVGA CLC 120 brings a solid build quality and reliable performance, featuring a 120mm radiator that can handle moderate overclocking while remaining relatively affordable. Its easy installation process and effective cooling make it a popular choice among PC builders who want a dependable liquid cooling solution without spending too much.
Which Budget Liquid Coolers Offer the Best Thermal Performance?
Some of the best budget liquid coolers offering excellent thermal performance include:
- Cooler Master MasterLiquid ML120L RGB: This cooler comes with a 120mm radiator and is equipped with RGB lighting, providing both aesthetics and functionality. Its dual-chamber pump design improves cooling efficiency and reduces noise, making it an ideal choice for budget-conscious gamers and PC builders.
- Deepcool GAMMAXX L240 V2: Known for its affordability and solid performance, this cooler features a 240mm radiator, which allows for better heat dissipation. The inclusion of two PWM fans ensures optimal airflow while maintaining low noise levels, making it suitable for both gaming and everyday computing.
- Thermaltake Water 3.0 120 ARGB: This unit blends performance with customizable RGB lighting, featuring a 120mm radiator that efficiently cools CPUs. It offers a user-friendly installation process and a reliable pump that maintains consistent temperatures during heavy workloads.
- ARCTIC Liquid Freezer II 120: This compact cooler is praised for its excellent cooling performance and low noise output. It comes with a unique design that includes a built-in fan on the pump, enhancing cooling for surrounding components while keeping the system quiet.
- NZXT Kraken X53: While slightly higher in price, the Kraken X53 is often considered a budget-friendly option for those who want premium features. It includes a 240mm radiator and customizable RGB effects, alongside a high-performance pump that delivers exceptional thermal performance and is easy to install.
What Unique Features Do These Budget Liquid Coolers Provide?
The best budget liquid coolers offer unique features that enhance cooling performance while being cost-effective.
- Affordable Price Point: Budget liquid coolers are designed to deliver effective cooling at a lower price, making them accessible to a wider range of consumers. This affordability often results from simplified designs and the use of cost-effective materials without compromising essential performance.
- Compact Design: Many budget liquid coolers feature a compact design, which allows for easy installation in smaller cases. This is particularly advantageous for users with limited space or those building compact systems, as it can fit in tight areas that traditional air coolers might not.
- Easy Installation: These coolers often come with user-friendly mounting systems that simplify the installation process. Most budget liquid coolers include clear instructions and pre-assembled components, making them suitable for beginners who may be intimidated by more complex cooling solutions.
- Decent Cooling Performance: Despite their lower price, budget liquid coolers typically provide adequate cooling performance for mid-range CPUs. They can effectively manage temperatures during gaming or heavy workloads, making them a practical choice for users looking to enhance their system’s thermal management.
- RGB Lighting Options: Many budget liquid coolers now come equipped with RGB lighting to enhance the aesthetic appeal of a build. This feature allows users to customize the look of their PC easily, adding a modern touch without significantly increasing the price.
- Low Noise Levels: Budget liquid coolers are often designed to operate quietly, featuring optimized pump and fan designs that minimize noise output. This is especially beneficial for users who value a quieter computing environment, such as gamers or content creators working in sound-sensitive situations.
- Wide Compatibility: These coolers are generally compatible with a variety of CPU sockets, making them versatile options for different builds. This broad compatibility ensures that users can find a suitable cooler for popular processors from multiple manufacturers.
How Can You Properly Install a Budget Liquid Cooler?
Proper installation of a budget liquid cooler involves several key steps to ensure optimal cooling performance and system compatibility.
- Choose the Right Cooler: Before installation, select a budget liquid cooler that fits your CPU socket type and has adequate cooling capacity for your system.
- Prepare the Case: Ensure your computer case has sufficient space for the cooler’s radiator and fans, as well as proper airflow to prevent overheating.
- Apply Thermal Paste: Clean the CPU surface and apply a small amount of thermal paste, which helps improve thermal conductivity between the CPU and the cooler’s water block.
- Mount the Water Block: Carefully place the water block over the CPU, aligning it with the mounting brackets, and secure it using the provided screws or clips.
- Install the Radiator and Fans: Position the radiator in your case, typically at the top or front, and attach the fans to ensure airflow direction is optimal for cooling.
- Connect the Pump and Fans: Connect the pump to the CPU fan header on the motherboard to ensure it receives power, and connect the radiator fans to the appropriate fan headers for optimal cooling performance.
- Fill the System (if applicable): If your cooler is a custom loop or requires filling, ensure you use the correct coolant and follow the manufacturer’s instructions for safely filling and bleeding the system.
- Test for Leaks: Before powering on your PC, check all connections and fittings for leaks by running the pump outside of the system for a short period if possible.
What Are the Essential Steps for Installing a Liquid Cooler?
Installing a liquid cooler involves several essential steps to ensure proper functionality and performance.
- Choose the Right Liquid Cooler: Select a liquid cooler that fits your budget and is compatible with your CPU socket. The best budget liquid cooler should provide efficient cooling while being affordable, balancing performance and cost.
- Prepare Your Workspace: Before starting the installation, clear your workspace and gather all necessary tools, such as screwdrivers and thermal paste. A clean and organized area helps prevent the loss of small components and makes the installation process smoother.
- Remove the Existing Cooler: If you are replacing an existing cooler, carefully detach it from the CPU by loosening the mounting screws and gently twisting it off. Be cautious not to damage the CPU or the motherboard during this process.
- Clean the CPU Surface: Use isopropyl alcohol and a lint-free cloth to clean the CPU surface, removing any old thermal paste. Proper cleaning ensures that the new cooler will have optimal thermal contact with the CPU.
- Apply Thermal Paste: Apply a small, pea-sized amount of thermal paste in the center of the CPU. This paste helps facilitate heat transfer from the CPU to the cooler and is crucial for efficient cooling.
- Mount the Liquid Cooler: Position the liquid cooler over the CPU, aligning it with the mounting brackets. Secure it in place by tightening the screws diagonally to ensure even pressure across the CPU.
- Connect the Pump and Fans: Plug the cooler’s pump and fan connectors into the appropriate motherboard headers. Ensuring these connections are secure is vital for the pump to operate correctly and for the fans to provide adequate airflow.
- Install Radiator and Fans: If your cooler includes a radiator, mount it to your case using the provided screws, ensuring the fans are oriented for optimal airflow. Proper placement of the radiator is important for effective heat dissipation.
- Test the System: Before closing the case, power on your system to check if the cooler is functioning properly. Monitor temperatures to ensure the cooler is performing as expected and there are no leaks in the system.
Where Can You Find Reliable Installation Guides or Videos?
You can find reliable installation guides or videos for the best budget liquid cooler in several reputable sources:
- YouTube: YouTube is a vast resource for installation guides where many tech enthusiasts and professionals share their experiences. You can find step-by-step video tutorials that visually demonstrate how to install various budget liquid coolers, often including tips for avoiding common pitfalls.
- Most manufacturers provide detailed installation guides and videos on their official websites. These resources are specifically tailored to their products, ensuring that you get accurate information and instructions, which can be crucial for the proper setup of your liquid cooler.
- Tech Forums: Online tech forums like Tom’s Hardware or Reddit’s r/buildapc community feature user-generated content that includes installation guides and troubleshooting tips. These forums are beneficial as they often contain real-world experiences and advice from users who have installed the same cooler, making them a valuable resource.
- PC Building Websites: Websites dedicated to PC building often have comprehensive guides and reviews that include installation instructions for various components, including liquid coolers. These sites typically provide detailed articles with images or videos that help you understand the installation process in the context of an entire build.
- Online Retailers: Retailers like Newegg or Amazon often have customer reviews and Q&A sections where buyers share their installation experiences. Sometimes, these reviews include links to helpful videos or detailed explanations that can guide you through the installation process.
What Common Issues Can Arise With Budget Liquid Coolers?
Common issues that can arise with budget liquid coolers include:
- Pump Noise: Budget liquid coolers often feature less expensive pumps that can generate noticeable noise during operation. This can be distracting, especially in quiet environments, and may lead to user dissatisfaction over time.
- Cooling Performance: While budget liquid coolers can provide better cooling than air coolers, their performance may not be as efficient as higher-end models. This can result in higher temperatures under load, which may not be ideal for overclocking or high-performance gaming.
- Leakage Risks: Budget models may have lower build quality, leading to a higher risk of leaks. A leak can damage components and lead to system failure, making it essential for users to carefully monitor their cooler over time.
- Limited Warranty: Many budget liquid coolers come with shorter warranties compared to premium options. This can indicate lower confidence in product longevity and reliability, making users hesitate when investing in a more affordable cooler.
- Installation Challenges: Some budget liquid coolers may have less intuitive installation processes or may not include all necessary mounting hardware. This can make setup cumbersome for users, particularly those who are less experienced with PC building.
- Fan Quality: The fans included with budget liquid coolers may have lower quality bearings, leading to a shorter lifespan and increased noise levels over time. This can detract from the overall cooling performance and user experience.
- Compatibility Issues: Budget liquid coolers may not be compatible with all CPU sockets or motherboard layouts. Users should ensure compatibility before purchase to avoid installation headaches and wasted resources.
How Can You Diagnose and Troubleshoot Problems?
Diagnosing and troubleshooting problems with the best budget liquid cooler involves several steps to ensure optimal performance.
- Check Compatibility: Before installation, verify that the liquid cooler is compatible with your CPU socket and case size. This includes ensuring that the radiator fits within your case and that the mounting brackets align with your motherboard.
- Inspect Installation: Ensure that the cooler is installed correctly, with the pump oriented properly and the thermal paste applied evenly. An improper installation can lead to inadequate cooling and overheating issues.
- Monitor Temperatures: Use software tools to monitor CPU temperatures during idle and load conditions. If temperatures are higher than expected, this could indicate issues with the cooler’s performance or installation.
- Check for Leaks: Inspect the cooler’s tubing and connections for any signs of leakage. A leak can severely impact cooling efficiency and may cause damage to other components.
- Fan Operation: Confirm that the radiator fans are spinning and functioning properly. Fans that are not working can lead to insufficient airflow, causing the system to overheat.
- Inspect for Air Bubbles: Air bubbles in the pump or coolant can hinder performance. Ensuring that the cooler is properly filled and bled can mitigate this issue.
- Assess Pump Functionality: Listen for unusual noises from the pump that may indicate failure. A non-functioning pump will prevent coolant circulation, leading to overheating.
- Check Power Connections: Ensure that all power connections to the pump and fans are secure and functioning. A loose connection can result in inadequate power supply, leading to performance issues.
- Update BIOS and Drivers: Sometimes, outdated BIOS or device drivers can affect the performance of cooling systems. Keeping these updated can improve compatibility and functionality.
- Evaluate System Load: High workloads can strain cooling systems. Assess your system’s load and consider whether your cooler is adequate for your CPU’s thermal output.
What Maintenance Tips Can Help Extend the Lifespan of Budget Liquid Coolers?
To extend the lifespan of budget liquid coolers, consider the following maintenance tips:
- Regular Cleaning: Dust and debris can accumulate on the radiator and fans, obstructing airflow and cooling efficiency.
- Monitor Fluid Levels: Check the coolant levels periodically to ensure the system is adequately filled, as low levels can lead to overheating.
- Check for Leaks: Inspect the cooler for any signs of leaks, as even small amounts can lead to significant problems over time.
- Maintain Optimal Ambient Temperature: Keep the computer in a well-ventilated area to prevent excessive heat buildup, which can strain the cooler.
- Use Quality Thermal Paste: Applying high-quality thermal paste between the CPU and the cooler can enhance thermal conductivity and improve cooling performance.
- Keep Fans Functioning: Ensure that the fans are always operational and replace any that are failing to maintain proper airflow.
Regular cleaning of the radiator and fans will help maintain proper airflow and cooling efficiency, preventing overheating and enhancing the cooler’s performance. Dust buildup can significantly hinder heat dissipation, so a routine cleaning schedule is recommended.
Monitoring fluid levels is crucial for liquid coolers, as insufficient coolant can lead to overheating and system failure. Regular checks can help catch any issues before they escalate, ensuring that the cooler operates effectively.
Checking for leaks is vital, as even minor leaks can compromise the cooling system’s performance and lead to hardware damage. Regular inspections can help identify and rectify leaks early on, extending the lifespan of the cooler.
Maintaining an optimal ambient temperature is essential to prevent overheating. Ensure the computer is placed in a well-ventilated area away from heat sources to help the cooler function efficiently.
Using quality thermal paste can significantly improve the thermal interface between the CPU and the cooler, enhancing heat transfer and cooling performance. Reapplying thermal paste periodically can help maintain optimal temperatures.
Ensuring that all fans are functioning properly is key to maintaining adequate airflow across the cooler. If fans are not working as intended, they should be replaced promptly to prevent overheating.
Related Post: