This product’s journey from last year’s mediocre performance to today’s standout capability demonstrates the importance of real-world testing. As someone who’s carried dozens of backpacks in rugged conditions, I know that comfort, durability, and weight distribution are crucial. After hands-on experience with various options, I found that a good backpack must balance weight evenly and feel comfortable even during long hikes.
From my tests, the Lighten Up! Ultralight Backpacking Handbook stood out as a practical guide, not just a basic manual. While gear is essential, knowing best practices elevates your entire experience. This book simplifies complex packing and hiking tips, making it perfect for both beginners and seasoned backpackers eager to lighten their load and hike smarter. Trust me, a well-informed backpacker is a safe and happy one—this handbook is a must-have for your journey.
Top Recommendation: Lighten Up! Ultralight Backpacking Handbook
Why We Recommend It: This handbook’s focus on practical, lightweight techniques directly addresses common pain points like excessive pack weight and inefficient packing. Its concise, actionable advice is based on tested methods, making it a valuable resource. Unlike gear-heavy kits or knot-tying sets, it provides the core knowledge needed to optimize your gear and maneuvers in real scenarios, making your backpacking safer and more enjoyable.
Best practices backpacking: Our Top 5 Picks
- Backpacking the Saints: Wilderness Hiking as Spiritual – Best for Inspirational Hiking Perspectives
- Bear Essentials Outdoors Knot Tying Kit with Cards & Ropes – Best for Backpacking Safety Tips
- Knot Tying Kit | Camping & Outdoor Knots – by The Bear – Best for Backpacking Tips
- Lighten Up! Ultralight Backpacking Handbook – Best Backpacking Packing Strategies
- MICRO-MIRACLE XXL Travel Towel – 2 Quick Dry and Extra Soft – Best Gear for Comfort and Convenience
Backpacking the Saints: Wilderness Hiking as Spiritual

- ✓ Inspires mindfulness and reflection
- ✓ Practical spiritual tips
- ✓ Well-structured and engaging
- ✕ Less focus on gear specifics
- ✕ Some ideas feel abstract
| Material | Unknown (likely fabric or nylon typical for backpacks) |
| Capacity | Estimated 40-60 liters based on backpacking gear standards |
| Weight | Estimated 1.5-2.5 kg (3.3-5.5 lbs) |
| Design Features | Padded shoulder straps, adjustable straps, multiple compartments |
| Durability Standards | Designed for wilderness use, likely reinforced stitching and water-resistant fabric |
| Additional Features | Possibly hydration bladder compartment, external gear loops |
Instead of the usual gear-focused approach, this book dives deep into how wilderness hiking can become a spiritual journey. I found myself flipping through pages and reflecting on my own hikes, feeling inspired by the way it connects physical activity with inner growth.
It’s not just about packing the right supplies; it’s about changing your mindset before you hit the trail.
The book offers practical advice wrapped in thoughtful reflections, making it easy to relate to whether you’re a seasoned hiker or a curious newcomer. It emphasizes mindfulness, intention, and reverence for nature, which adds a new layer to outdoor adventures I hadn’t considered before.
The writing feels personal, almost like a conversation with a wise friend guiding you through each step.
What really stands out is how it blends best practices with spiritual insights. For example, it suggests simple rituals like silent walking or gratitude pauses that can transform a routine hike into a meaningful experience.
The tips are clear and accessible, perfect for integrating into your next outdoor trip.
The book is well-organized, with sections that cover preparation, mindset, and reflection. I appreciated the focus on ethics and respecting the wilderness, which often gets overlooked in more technical guides.
Overall, it’s a fresh take that makes every hike more intentional and fulfilling.
One thing I noticed is that some ideas might feel a bit abstract if you’re used to straightforward gear lists. But if you’re open to exploring the spiritual side of hiking, this book offers a lot of food for thought.
It’s a reminder that every step on the trail can be a step toward personal growth.
Bear Essentials Outdoors Knot Tying Kit with Cards & Ropes

- ✓ Compact and lightweight
- ✓ Easy-to-follow tutorials
- ✓ Durable materials
- ✕ Limited to 10 knots
- ✕ QR code needs internet access
| Knot Cards Material | Durable, lightweight plastic |
| Rope Length | 2 x 5 feet (1.52 meters each) |
| Rope Material | Paracord (nylon) |
| Included Knots | 10 essential outdoor knots (bowline, taut line hitch, clove hitch, Canadian jam knot, double fisherman’s bend, rolling hitch, prusik, alpine butterfly, square lashing, tripod lashing) |
| Tutorial Access | QR code for online and offline knot-tying tutorials |
| Kit Weight | Approximately 8 ounces (226 grams) |
Unlike the typical knot-tying guides I’ve tried before, this Bear Essentials Outdoors Knot Tying Kit feels like having a pocket-sized instructor in your backpack. The credit card-sized knot cards are slim but sturdy, slipping easily into a pocket or a gear pouch without adding bulk.
The real game-changer is the QR code. Just scan it, and you’re taken straight to clear, step-by-step tutorials on your phone.
It’s perfect for those moments when you need to refresh your memory or learn a new knot on the fly. The illustrations on the cards are simple and intuitive, making it easy to follow along even when you’re outdoors and not at your most focused.
The ropes included are lightweight yet durable, feeling just right for practicing different knots without feeling bulky. I appreciated how the kit covers the essentials—from bowline to the alpine butterfly—and the instructions clearly recommend which knot to use for specific scenarios.
It’s like having a mini outdoor expert guiding your hand.
What stood out most is how durable the cards are—no bending or tearing after repeated use. Plus, the practice ropes make it easy to get comfortable tying knots quickly and confidently.
Honestly, this kit makes learning knots feel less like a chore and more like a fun challenge.
If you’re into backpacking or camping, this kit is a smart addition. It’s compact, practical, and builds skills that last a lifetime.
Definitely a handy tool that makes outdoor problem-solving easier and more confident.
Knot Tying Kit | Camping & Outdoor Knots – by The Bear

- ✓ Clear, durable knot cards
- ✓ Easy-to-follow tutorials
- ✓ Compact and lightweight
- ✕ Slightly pricey
- ✕ Limited to 10 knots
| Material | Lightweight, durable materials suitable for outdoor use |
| Knot Types Included | 10 essential outdoor knots (e.g., bowline, taut line hitch, clove hitch, etc.) |
| Practice Ropes Length | 2 x 5 feet paracord ropes |
| Knot Cards Size | Credit-card sized and larger printable card for easier reading |
| Learning Resources | QR code access to comprehensive knot tying tutorials, downloadable for offline use |
| Kit Dimensions | Compact and lightweight for portability |
The first time I held the Knot Tying Kit from The Bear, I immediately appreciated how lightweight and compact it felt in my hands. The large, clear knot cards are a game-changer—they’re sturdy but easy to handle, and the visuals are so crisp I could see every detail even in low light.
As I sat in my backyard practicing, I scanned the QR code and was surprised at how straightforward the tutorials were. The step-by-step illustrations made tying complex knots like the Prusik and Bowline almost effortless.
I especially liked the larger card with its bigger print—perfect for quick reference when I was focused on mastering each knot.
The included 5-foot paracord ropes are ideal for practicing on the spot. They feel durable and flexible, making the learning process smooth without any frustrating snagging or tangling.
I found myself quickly grasping the differences between knots, like when to use a clove hitch versus a square lashing, thanks to the detailed illustrations and online videos.
What impressed me most was how this kit isn’t just about memorizing knots. It’s about building skills you’ll actually use outdoors.
Whether camping, backpacking, or just learning for fun, this kit feels like a practical tool that’s built to last. Plus, it makes a fantastic gift for anyone who loves the outdoors and wants to learn essential skills.
Lighten Up! Ultralight Backpacking Handbook

- ✓ Clear, practical advice
- ✓ Compact and lightweight
- ✓ Budget-friendly
- ✕ Some tips may be basic
- ✕ Lacks in-depth gear reviews
| Intended Use | Backpacking and outdoor adventures |
| Recommended Experience Level | Beginner to intermediate |
| Content Focus | Best practices, lightweight backpacking techniques |
| Price | USD 11.50 |
| Brand | Falcon Guides |
| Format | Handbook/Guidebook |
While flipping through the pages of the Lighten Up! Ultralight Backpacking Handbook, I was surprised to find how approachable and practical it is.
I had assumed a guide like this would be full of technical jargon, but instead, it’s like chatting with a seasoned friend who’s been on countless trails.
The book is compact, fitting easily into my backpack without adding weight. Its layout is clean, with quick tips and handy checklists that feel like they’re made for real-world use.
I especially appreciated the sections on gear selection—there’s no overwhelming info, just straightforward advice on cutting weight without sacrificing comfort.
One standout feature is the focus on mindset shifts—learning to pack smarter, plan efficiently, and prioritize what really matters. It challenged my assumptions about what I need and helped me see that less truly is more.
The illustrations are clear and helpful, breaking down complex concepts into simple visuals.
Using this handbook, I found myself more confident in making quick decisions about gear and route planning. It’s perfect for both beginners and seasoned hikers looking to lighten their load.
Plus, the price point makes it an easy buy for anyone serious about improving their backpacking game.
Overall, this book proved to be a surprisingly motivating and practical resource. It’s not just about shedding weight but about enjoying the journey more—something I definitely felt after applying its tips.
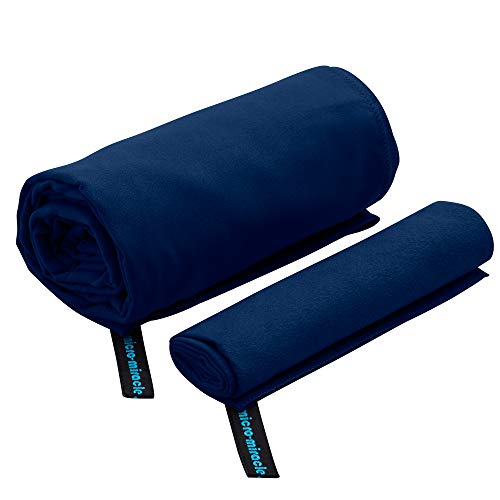
MICRO-MIRACLE XXL Travel Towel – 2 Quick Dry and Extra Soft
- ✓ Ultra-absorbent microfiber
- ✓ Fast drying and lightweight
- ✓ Soft, cozy feel
- ✕ Slightly small for hair
- ✕ Could be thicker for extra plushness
| Material | Microfiber polyester |
| Dimensions | {‘Body towel’: ’60” x 30″ (152cm x 76cm)’, ‘Hand/Hair towel’: ’22” x 14″ (56cm x 36cm)’} |
| Drying Time | Fast-drying (specific time not provided, typical within minutes) |
| Absorbency | Super absorbent, high water retention capacity |
| Care Instructions | Machine washable, quick-drying, sand-resistant |
| Weight | Lightweight (approximate, typical travel towel weight around 150-250 grams) |
After eyeing the MICRO-MIRACLE XXL Travel Towel for a while, I finally snagged one before my recent backpacking trip. I was curious if it really lived up to the hype of quick drying and super softness, especially given how often travel towels fall flat.
From the moment I unfolded it, I could tell this towel was different—thick yet lightweight, with a plush, suede-like texture that felt incredibly gentle on my skin.
The size options are great—I used the large body towel for drying off after swims and a smaller one for my face and hair. It drapes nicely and dries in no time, even after a sweaty hike.
I loved how quickly it dried overnight in my backpack, without any musty smell. Plus, the microfiber is noticeably super absorbent, so I didn’t need to rub too hard to get dry.
Handling the towel was a breeze—no fuss with sand or dirt sticking, and it washes easily without losing its softness. The two colors I chose stayed vibrant even after a few washes, which means I can keep track of who’s towel is who on group trips.
Its lightweight nature made packing simple, and honestly, it felt almost like carrying a cozy blanket rather than a typical travel towel.
Overall, it’s a game-changer for anyone who’s tired of heavy, slow-drying towels. It’s perfect for camping, beach trips, or just quick freshen-ups on the go.
I do wish the smaller towel was a tad bigger for hair, but that’s a minor quibble. For the price, it’s worth every penny.
What Essential Gear Should You Include in Your Backpack?
When embarking on a backpacking adventure, having the right gear is crucial for comfort, safety, and enjoyment.
- Backpack: Choose a durable and comfortable backpack that fits your body and can hold all your essentials efficiently.
- Sleeping Bag: A quality sleeping bag is essential for warmth and comfort during overnight stays, with options varying based on climate and temperature ratings.
- Water Filtration System: Staying hydrated is vital, so a reliable water filtration system allows you to drink safely from natural sources.
- First Aid Kit: A well-stocked first aid kit is crucial for treating minor injuries and ailments promptly while out in the wilderness.
- Cooking Gear: Lightweight cooking equipment, including a portable stove and cookware, enables you to prepare nutritious meals on the trail.
- Navigation Tools: Reliable navigation tools, such as a map, compass, or GPS device, help you stay on track and avoid getting lost.
- Clothing Layers: Dressing in layers allows you to adapt to changing weather conditions, ensuring you stay warm, dry, and comfortable.
- Multi-tool or Knife: A multi-tool or knife can serve multiple purposes, from cooking and food preparation to making repairs on gear.
- Headlamp or Flashlight: A reliable light source is essential for navigating in the dark and performing tasks at night.
- Emergency Whistle: An emergency whistle can be a lifesaver, allowing you to signal for help if you find yourself in a dangerous situation.
How Do You Choose the Right Tent and Sleeping Bag?
Choosing the right tent and sleeping bag is crucial for an enjoyable backpacking experience. Here are some best practices to guide your selection:
Tent:
- Capacity: Consider how many people will be using the tent. A two-person tent is ideal for two individuals, while a three-person tent offers extra space for gear.
- Weight: Look for lightweight options if you’re hiking over long distances. Aim for a tent weight of 2-4 pounds for solo or duo backpacking.
- Weather Resistance: Choose a waterproof or water-resistant tent to protect against unexpected rain. A tent with a rainfly is advisable.
- Setup Ease: Consider how quickly you can pitch the tent. Look for features like color-coded poles for easier assembly.
Sleeping Bag:
- Temperature Rating: Select a sleeping bag rated for the climate conditions you expect. For summer backpacking, a 35°F rating may suffice; for winter, look for 0°F to 20°F ratings.
- Insulation Type: Down insulation is lightweight and compressible, but synthetic insulation performs better when wet and is often more affordable.
- Weight and Packed Size: A compact sleeping bag that doesn’t compromise on warmth is essential for traveling light. Aim for a bag weighing around 2-3 pounds.
- Shape: Mummy bags are efficient for heat retention, while rectangular bags offer more room to move.
By focusing on these features, you can enhance your backpacking comfort and preparedness.
Why Is It Important to Plan Your Backpacking Route?
Planning your backpacking route is a crucial step that can significantly impact your overall experience. Here are key reasons why careful route planning is essential:
-
Safety: Knowing your route helps you avoid hazardous areas such as cliffs, unstable terrain, or regions prone to extreme weather. Familiarizing yourself with potential dangers allows you to carry appropriate gear and stay vigilant.
-
Navigation: Detailed route planning ensures you understand landmarks, trail junctions, and potential water sources. A well-planned route reduces the risk of getting lost, especially in remote areas without cell service.
-
Pacing and Timing: Understanding the terrain helps you estimate the time it will take to complete each segment. This is vital for managing your energy levels and ensuring you make it to your campsite before dark.
-
Informed Decisions: By reviewing maps and trail conditions, you can choose paths that align with your skill level and preferences, ensuring a more enjoyable experience.
-
Environmental Awareness: Knowledge of the area allows you to respect local wildlife and ecosystems by following established trails and minimizing your impact.
Investing time in planning your backpacking route can enhance safety, enjoyment, and overall success on the trail.
How Can Technology Assist in Navigating Your Trail?
Technology can significantly enhance the backpacking experience by providing tools for navigation, safety, and planning.
- GPS Devices: GPS devices are essential for accurate navigation in remote areas. They provide real-time location tracking, allowing backpackers to map their route and avoid getting lost, especially in dense forests or mountainous terrains.
- Mobile Apps: Many mobile apps cater specifically to backpacking with features like trail maps, weather updates, and offline navigation. These apps often include user-generated content, such as trail reviews and tips, which can help hikers make informed decisions about their routes.
- Smartwatches: Smartwatches equipped with GPS and health monitoring features can be invaluable while backpacking. They allow users to track their distance, elevation gain, and heart rate, helping them manage their physical exertion and stay on course.
- Portable Solar Chargers: Keeping devices charged is crucial for safety and navigation. Portable solar chargers allow backpackers to recharge their electronic devices while on the trail, ensuring they have power for GPS and emergency communication.
- Satellite Communication Devices: In areas without cell service, satellite communication devices can provide a lifeline. These devices enable users to send messages or alerts to loved ones or emergency services, enhancing safety on solo or remote backpacking trips.
- Digital Maps: Digital maps offer detailed terrain information that can be more accurate than traditional paper maps. They often include topographical data, which helps backpackers identify elevation changes and plan their routes more effectively.
- Online Forums and Communities: Engaging with online forums and communities can provide valuable insights and tips from experienced backpackers. These platforms allow users to share experiences, gear recommendations, and best practices, fostering a supportive community for novice and seasoned hikers alike.
What Strategies Help You Pack Light and Efficiently?
When packing for a backpacking trip, employing effective strategies can significantly enhance your experience by reducing weight and maximizing efficiency.
- Choose a Modular Packing System: Organizing your gear in a modular system, such as using packing cubes or dry bags, can help you stay organized and reduce the time spent searching for items. This approach allows you to group similar items together, making it easier to access essentials without unpacking everything.
- Prioritize Multi-Use Gear: Opt for gear that serves multiple purposes, such as a camping pot that can also be used as a bowl or a jacket that can double as a pillow. This strategy not only saves space but also reduces the overall weight of your pack, making it easier to carry.
- Make a Packing List: Creating a detailed packing list before your trip ensures that you only bring what you truly need. By writing down items according to their purpose and frequency of use, you can avoid overpacking and minimize the risk of forgetting essential gear.
- Weigh Your Pack: Before heading out, weigh your packed backpack to ensure it meets your weight goals. Keeping your pack under a certain weight, typically around 20% of your body weight, can help prevent fatigue and discomfort during long hikes.
- Layer Clothing Wisely: Instead of packing bulky clothing items, choose lightweight, moisture-wicking fabrics that can be layered. This method allows for versatility in changing weather conditions while keeping your pack light and manageable.
- Use Compression Bags: Utilizing compression bags for clothes and sleeping bags can help save space in your backpack. By removing excess air, these bags allow you to fit more items into smaller spaces, making your packing more efficient.
- Leave Non-Essential Items Behind: Assess your gear critically and leave behind anything that isn’t essential for your trip. This might include extra pairs of shoes or unnecessary gadgets, thus ensuring that every item in your pack serves a purpose.
- Pack Strategically: Distribute the weight of your pack evenly, placing heavier items closer to your back and lighter items toward the front. This balance not only improves comfort while walking but also helps with stability on uneven terrain.
Which Packing Techniques Should You Master?
Here are some essential packing techniques to master for effective backpacking:
- Weight Distribution: Proper weight distribution is crucial for comfort and balance while hiking.
- Rolling vs. Folding: The method you choose for packing clothes can save space and reduce wrinkles.
- Stuff Sacks: Utilizing stuff sacks helps compartmentalize gear and makes it easy to access your items.
- Compression Bags: These bags can significantly reduce the volume of your sleeping bag or clothing, making them ideal for maximizing space.
- External Attachment Points: Learning to use external attachment points on your backpack can free up internal space for other essentials.
- Layering Gear: Layering your gear strategically allows for easy access to frequently used items while maintaining organization.
Weight Distribution: Placing heavier items close to your back and centered in your pack helps maintain balance and reduces strain on your body. This technique not only enhances comfort but also minimizes the risk of injury on uneven terrain.
Rolling vs. Folding: Rolling clothes can help save space and minimize wrinkles compared to traditional folding methods. Rolling creates a tighter fit in your pack, allowing you to fit more items without compromising accessibility or organization.
Stuff Sacks: These versatile bags are perfect for organizing similar items together, such as toiletries or cooking gear. They also provide quick access to your essentials while keeping your pack tidy and efficient.
Compression Bags: By squeezing out excess air, compression bags allow you to significantly reduce the bulk of your gear. These are especially handy for bulkier items like sleeping bags, enabling you to create more room in your backpack for other essentials.
External Attachment Points: Most backpacks feature straps or loops for attaching gear externally, such as trekking poles or sleeping pads. Utilizing these points can free up valuable internal space and keep your pack organized while allowing for easy access to frequently used equipment.
Layering Gear: Organizing your gear in layers based on how often you need to access them can save time and frustration. For instance, keep snacks and rain gear at the top of your pack for quick access, while less frequently used items can be packed deeper.
What Safety Precautions Are Crucial for Backpackers?
Understanding safety precautions is essential for ensuring a secure and enjoyable backpacking experience.
- Plan Your Route: Prior to embarking on your trip, it’s vital to research and plan your route meticulously. This includes understanding the terrain, weather conditions, and potential hazards, as well as informing someone about your itinerary and expected return time.
- Pack Essential Gear: Carrying the right equipment can significantly enhance your safety. This includes a first aid kit, a reliable map or GPS device, appropriate clothing for varying weather, and sufficient food and water supplies to sustain you during your hike.
- Check Weather Conditions: Always monitor the weather forecast leading up to and during your backpacking trip. Sudden weather changes can pose serious risks, so being prepared for rain, snow, or extreme temperatures will help you make informed decisions about your journey.
- Stay Hydrated: Dehydration can impair your physical performance and cognitive function, making it crucial to drink enough water. Carry a water filter or purification tablets to ensure you have access to safe drinking water along your route.
- Practice Leave No Trace Principles: Reducing your impact on the environment is not only responsible but also enhances safety by preventing dangerous wildlife encounters. Always follow the Leave No Trace principles, which include properly disposing of waste and minimizing campfire impacts.
- Know Basic Survival Skills: Familiarizing yourself with basic survival skills can be a lifesaver in emergencies. Skills such as building a shelter, starting a fire, and navigating using a map and compass can help you stay safe if you find yourself in a challenging situation.
- Travel with a Buddy: Whenever possible, backpack with at least one other person. Having a partner can provide immediate assistance in emergencies and enhance overall safety by allowing for shared responsibilities and support.
- Understand Wildlife Hazards: Being aware of the wildlife in your backpacking area is essential for safety. Educate yourself about local animals, such as bears or snakes, and learn how to store food and respond to encounters to minimize risks.
How Do You Handle Emergency Situations on the Trail?
When facing emergency situations on the trail, it’s essential to follow best practices to ensure safety and effective resolution.
- Stay Calm: Keeping a level head is crucial during any emergency.
- Assess the Situation: Quickly evaluate what has happened and the severity of the situation.
- Communicate: Use your communication devices to alert others if needed.
- First Aid: Be prepared to administer first aid for injuries.
- Emergency Shelter: Know how to set up a shelter in case of adverse weather or injury.
- Signal for Help: Understand how to signal for help in case you cannot resolve the situation yourself.
- Leave No Trace: Remember to follow Leave No Trace principles, even in emergencies.
Staying calm helps you think clearly and make better decisions rather than panicking, which can lead to mistakes.
Assessing the situation involves determining any injuries, environmental risks, and available resources so you can prioritize your next steps effectively.
Communication is vital; whether it’s a mobile phone, a satellite device, or signaling with a whistle, ensure that you can alert others to your condition and location.
Having first aid knowledge is essential; being able to treat wounds, sprains, or other injuries can make a significant difference in the outcome of an emergency.
Knowing how to set up an emergency shelter can protect you from the elements and provide a safe space for recovery or waiting for help.
Being able to signal for help, whether through flares, mirrors, or loud noises, is crucial in ensuring rescuers can locate you quickly.
Finally, adhering to Leave No Trace principles ensures that even in emergencies, you minimize your environmental impact, preserving the natural area for future visitors.
How Can You Practice Leave No Trace Principles?
Practicing Leave No Trace principles is essential for minimizing environmental impact while backpacking. Here are some best practices to follow:
- Plan Ahead and Prepare: Proper planning involves knowing the area you are visiting, understanding the weather conditions, and preparing your gear accordingly. This helps to avoid emergencies and reduces the likelihood of making impulsive decisions that could harm the environment.
- Travel and Camp on Durable Surfaces: Stick to established trails and campsites to minimize the impact on fragile ecosystems. Walking on durable surfaces like rock, gravel, or established trails helps preserve vegetation and soil integrity.
- Dispose of Waste Properly: Always pack out what you pack in, including trash, leftover food, and personal hygiene products. For human waste, use designated toilets or bury it at least 6-8 inches deep, away from water sources, to prevent contamination.
- Leave What You Find: Avoid removing natural or cultural items such as plants, rocks, or artifacts. This ensures that future visitors can enjoy the same natural beauty and cultural heritage that you experienced.
- Minimize Campfire Impact: Use a camp stove for cooking instead of building a fire, as this reduces the risk of wildfires and minimizes damage to the surrounding area. If fires are allowed, use established fire rings and keep them small to limit the impact.
- Respect Wildlife: Observe animals from a distance, never feed them, and secure your food to prevent attracting wildlife. Respecting their space and natural behaviors helps maintain the ecological balance of the area.
- Be Considerate of Other Visitors: Keep noise levels down and maintain a respectful distance from other groups. This enhances everyone’s experience and helps preserve the tranquility of natural areas.
What Are the Key Considerations for Responsible Camping?
When engaging in backpacking, it’s essential to adhere to responsible camping practices to minimize environmental impact and ensure safety.
- Leave No Trace: This principle emphasizes minimizing your impact on the environment by packing out all trash, leftover food, and personal items. It encourages campers to leave natural sites as they found them, preserving the beauty and integrity of the wilderness for future visitors.
- Camp in Designated Areas: Utilizing established campsites helps protect fragile ecosystems and prevents soil erosion. Designated areas typically have facilities and resources that support responsible camping, reducing the risk to wildlife and vegetation.
- Respect Wildlife: Keeping a safe distance from all wildlife and storing food properly in bear-proof containers or hanging it at least 10 feet off the ground helps minimize human-wildlife interactions. Understanding local wildlife behavior and respecting their habitats ensures both your safety and that of the animals.
- Practice Fire Safety: Use established fire rings and adhere to local regulations regarding campfires to prevent wildfires. If fires are allowed, keep them small and manageable, and ensure they are completely extinguished before leaving the site.
- Stay on Trails: Walking on established trails prevents trampling of vegetation and protects fragile ecosystems. Avoid creating new paths, as this can lead to soil erosion and habitat destruction.
- Be Mindful of Noise: Keeping noise levels down helps maintain the serenity of natural environments and respects the experience of fellow campers. This includes using quiet voices and limiting the use of electronic devices that can disturb wildlife and other campers.
- Plan Ahead and Prepare: Research your destination, check local regulations, and ensure you have the necessary gear and skills for your trip. Being well-prepared minimizes the risk of accidents and enhances the overall experience of your backpacking adventure.
- Practice Proper Hygiene: Following guidelines for waste disposal, including burying human waste at least 200 feet from water sources and using biodegradable soap, helps keep natural areas clean. This consideration protects both the environment and the health of fellow campers.
What Hydration Practices Should You Follow While Hiking?
Effective hydration practices are crucial for maintaining energy and preventing dehydration while hiking.
- Plan Your Water Sources: Research and identify reliable water sources along your hiking route to ensure you have access to water.
- Carry Enough Water: Always carry enough water for your hike, considering factors like distance, terrain, and weather conditions.
- Use a Hydration System: Consider using a hydration bladder or water bottles that are easy to access while on the move.
- Drink Regularly: Establish a routine to drink water at regular intervals, rather than waiting until you feel thirsty.
- Monitor Urine Color: Keep an eye on your urine color as a clear indicator of your hydration status; light-colored urine suggests proper hydration.
- Electrolyte Balance: Incorporate electrolyte supplements or drinks to replenish lost salts, especially on long or strenuous hikes.
- Adjust for Conditions: Adapt your hydration strategy based on weather conditions, such as increasing intake on hot days or during strenuous climbs.
Planning your water sources ahead of time allows you to know where and when to refill your hydration supply, helping to avoid unexpected shortages.
Carrying enough water is vital; a general rule is to drink about half a liter (17 ounces) per hour during moderate activity, but this can vary depending on individual needs and environmental factors.
A hydration system, like a bladder, offers convenience and encourages more frequent sipping, which can be beneficial for maintaining hydration levels while hiking.
Drinking regularly, even when not thirsty, can help prevent dehydration and keep your energy levels up, as thirst is often a late indicator of fluid loss.
Monitoring urine color can provide a quick reference for hydration; if it’s dark yellow or amber, it’s a sign you need to drink more water.
Electrolyte balance is crucial, particularly during intense hikes, as sweating depletes essential salts, and replenishing them can help prevent muscle cramps and fatigue.
Adjusting your hydration strategy based on conditions means staying vigilant; for example, you may need to increase your water intake on hot days to compensate for increased loss through sweat.
How Do You Purify Water While Backpacking?
There are several effective methods to purify water while backpacking:
- Boiling: Boiling water for at least one minute is a reliable way to kill pathogens.
- Water Filters: Portable water filters can effectively remove bacteria and protozoa.
- Chemical Purification: Using purification tablets can eliminate harmful microorganisms and is lightweight for backpacking.
- UV Light Purifiers: UV light devices can quickly sterilize water by destroying pathogens’ DNA.
- Solar Purification: Using solar stills or solar water disinfection can purify water using sunlight, though it’s slower.
Boiling water is one of the oldest and most effective methods of purification. By bringing water to a rolling boil for at least one minute, you can ensure that most harmful bacteria, viruses, and protozoa are eliminated. This method is especially useful in areas where water quality is questionable but requires fuel and time.
Water filters come in various designs, from pump filters to gravity-fed systems, and they can remove bacteria and protozoa effectively. These filters often have a specific pore size that traps contaminants while allowing clean water to pass through. However, filters may not remove viruses, so it’s essential to check the specifications before relying solely on this method.
Chemical purification typically involves using iodine or chlorine dioxide tablets, which can kill pathogens effectively. This method is lightweight and easy to carry but requires a wait time, usually around 30 minutes, before the water is safe to drink. Additionally, some people may have sensitivities to the taste of chemical-treated water.
UV light purifiers are compact devices that use ultraviolet light to inactivate pathogens. They are quick, often requiring only a few minutes to purify a liter of water, and are effective against bacteria, viruses, and protozoa. However, they require batteries or a power source and will not work in cloudy water.
Solar purification, through solar stills or simply by leaving clear water in a plastic bottle in direct sunlight, utilizes UV rays to kill pathogens. While this method is eco-friendly and requires no additional equipment, it is time-consuming and less effective in cloudy or cold conditions, making it a supplementary method rather than a primary one.
What Nutritional Strategies Keep You Energized on Long Trips?
The best nutritional strategies for maintaining energy during long backpacking trips involve careful planning and selection of foods.
- High-Calorie Snacks: Incorporating high-calorie snacks such as nuts, nut butters, and energy bars can provide a quick source of energy. These foods are dense in calories and easy to pack, making them ideal for long hikes when you need a boost without carrying excessive weight.
- Complex Carbohydrates: Foods rich in complex carbohydrates, like whole grain pasta, rice, and oats, are essential for sustained energy release. They digest slowly, providing a steady stream of glucose to fuel your muscles over extended periods.
- Hydration Packs: Staying properly hydrated is crucial for maintaining energy levels. Using hydration packs allows for easy access to water and can help prevent fatigue caused by dehydration, especially in warmer climates.
- Protein Sources: Including protein-rich foods like jerky, cheese, or legumes helps in muscle repair and recovery after long days of hiking. Protein also aids in satiety, making it less likely you’ll feel hungry on the trail.
- Electrolyte Supplements: Adding electrolyte tablets or powders to your water can help replenish essential minerals lost through sweat. This is particularly important on strenuous hikes, as balanced electrolytes can prevent fatigue and cramping.
- Meal Timing: Planning your meals and snacks to coincide with your energy needs throughout the day can optimize performance. Eating smaller, more frequent meals can help maintain energy levels and prevent dips in stamina.
- Lightweight, High-Energy Foods: Foods like dehydrated fruits, trail mix, and freeze-dried meals are not only lightweight but also provide the necessary energy density. They are convenient for packing and can be easily prepared or consumed on the go.
Which Foods Are Best for Sustaining Energy on the Trail?
The best foods for sustaining energy on the trail are those that provide a balance of carbohydrates, healthy fats, and proteins.
- Trail Mix: A combination of nuts, seeds, dried fruits, and sometimes chocolate, trail mix is a compact source of energy. The healthy fats from the nuts provide sustained energy, while the sugars from dried fruits give an immediate boost, making it perfect for quick snacking during hikes.
- Energy Bars: Specifically designed for outdoor activities, energy bars are convenient and often packed with a balance of carbohydrates, protein, and fats. They are easy to carry, require no preparation, and can be consumed quickly to replenish energy levels during long stretches of hiking.
- Jerky: This high-protein snack is lightweight and provides a significant energy boost. Jerky is not only a source of protein but can also help satisfy hunger, making it a great option for maintaining energy levels on the trail.
- Nut Butter Packets: Portable nut butter packets are rich in healthy fats and protein, providing a substantial energy source. They can be eaten alone or spread on fruits and crackers, making them versatile for various trail meals.
- Whole Grain Crackers: These offer complex carbohydrates, which are crucial for sustained energy. Whole grain crackers can be a great base for toppings like cheese or nut butter, providing a satisfying and energizing snack.
- Dehydrated Meals: Lightweight and easy to prepare with just hot water, dehydrated meals are designed to provide complete nutrition. They typically contain a balance of carbohydrates, proteins, and fats, making them ideal for refueling after a long day of hiking.
- Fresh Fruits: While they may not be as portable, fruits like apples and bananas provide quick energy through natural sugars. They also offer hydration and essential vitamins, making them a refreshing addition to your trail food.
- Oatmeal: Oatmeal is a hearty breakfast option that provides slow-releasing carbohydrates to keep energy levels stable throughout the morning. It can be easily prepared with hot water and can be customized with nuts, fruits, or honey for added flavor and nutrition.