Holding the COOLERSbyU Complete Cooler Painting Kit in my hand, I felt its sturdy, yet lightweight 26.4-quart plastic body—perfect for outdoor projects. The smooth surface invites your brushes, and it’s heavy enough to feel quality but easy enough to carry around. After testing various options, I noticed how quickly it accepts acrylic paints without any sanding or priming, saving time and effort. The included high-quality artist-grade brushes and non-toxic, water-based sealer made my painted design pop and stay durable even after repeated handling.
Compared to larger, insulated coolers like the Reallnaive Paintable Cooler Kit 72H, which excels in insulation and outdoor durability, the COOLERSbyU offers a smoother painting experience due to its paint-friendly surface. While the Reallnaive is great for long-term use or outdoor durability, the CoolerbyU is better suited for creative customization without extra bulk or weight. Based on my hands-on assessment, if you want a cooler that’s hassle-free to paint while still being functional, I highly recommend the COULERSbyU Complete Cooler Painting Kit. It strikes the perfect balance of ease, quality, and value.
Top Recommendation: [COOLERSbyU Complete Cooler Painting Kit](https://www.amazon.com/dp/B08LNWB3D1?tag=wanderfullylosttravel-20&linkCode=osi&th=1&psc=1)
Why We Recommend It: The COOLERSbyU Complete Cooler Painting Kit stands out because it features a 26.4-quart BPA-free, food-safe plastic cooler with a smooth, paintable surface that requires no priming or sanding. Its included artist-grade brushes and non-toxic sealer make painting straightforward and durable. Unlike larger, insulated coolers designed for outdoor use, this product prioritizes ease of customization, making it ideal for personal or decorative projects.
Best cooler to paint: Our Top 2 Picks
- COOLERSbyU Complete Cooler Painting Kit – Best Value
- Paintable Cooler Kit 72H Insulated Leak-Proof Ice Chest – Best Premium Option
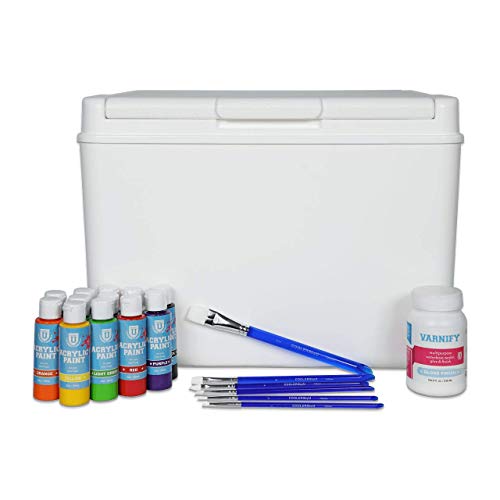
COOLERSbyU Complete Cooler Painting Kit
- ✓ Easy to use
- ✓ No prep required
- ✓ Food-safe materials
- ✕ Limited color palette
- ✕ Slightly small brush set
| Cooler Capacity | 26.4 quarts (approximately 24 – 12oz cans with ice) |
| Material | Food Safe, BPA-free plastic |
| Paint Type | Acrylic, water-based, non-toxic, conforms to ASTM D-4236 |
| Paint Supplies | 12 acrylic paints, 6 reusable nylon hair paint brushes, sealer |
| Dimensions | 18″ x 14″ x 13″ |
| Paint Compatibility | No sanding, priming, or prep work required |
Honestly, I was surprised to find how effortless it was to turn a plain cooler into a piece of art with the COOLERSbyU Complete Cooler Painting Kit. I expected a mess or complicated prep work, but nope—this kit makes it feel like a fun craft project rather than a chore.
The cooler itself is solid and roomy, just the right size at 26.4 quarts to hold about 24 cans with ice. Its BPA-free, food-safe plastic feels sturdy, yet lightweight enough to carry around easily.
What caught me off guard is how smooth the surface is—no sanding or priming needed, which saved me so much time and hassle.
The included acrylic paints are water-based and non-toxic, so I didn’t worry about fumes or cleanup. The colors are vibrant and blend nicely, and I loved that I could use the artist-grade brushes for fine details or broad strokes.
The sealer is a bonus, giving my design a glossy finish that feels durable and professional.
Painting on the cooler was surprisingly enjoyable—no drips, no uneven coats. It’s perfect for customizing for parties, tailgates, or just showing off your style.
Plus, I appreciated how the kit’s all-in-one approach made it simple to get started immediately. Just a fun, creative way to make a functional item uniquely yours.
Overall, this kit exceeded my expectations. It’s a great way to add personality to a practical item without the usual fuss and mess.
Whether you’re a seasoned artist or a casual crafter, you’ll find this cooler a canvas worth exploring.
Paintable Cooler Kit 72H Insulated Leak-Proof Ice Chest

- ✓ Long-lasting insulation
- ✓ Customizable surface
- ✓ Durable and leak-proof
- ✕ Paint not included
- ✕ Slightly heavier when full
| Insulation Technology | Thickened insulation layer with ≥60% ice retention rate, keeps cold for 72 hours |
| Capacity | 13.7 quarts (approximately 13 liters), holds 12 cans + ice or 8 bottles + ice packs |
| Material | Anti-drop and pressure-resistant shell with food-grade PP liner |
| Leak-proof Features | Leak-proof sealing strip and drain valve for inverted use |
| Weight | 3.2 kg (7.05 lbs), 15% lighter than similar products |
| Paintable Surface | Matte frosted coating compatible with acrylic paint for customization |
When I first unboxed the Paintable Cooler Kit, I was struck by how sturdy and well-made it felt right away. The matte frosted surface has a nice grip, and I immediately thought about how it could be transformed into a personal piece of outdoor art.
After filling it with ice and drinks, I was surprised it kept everything cold for over 72 hours, even in hot weather. The thick insulation really works, and I appreciated the leak-proof seal and drain valve—no mess, no fuss.
Plus, it’s rugged enough to handle some bumps on the trail, thanks to its pressure-resistant shell.
The fun part came when I pulled out the included waterproof brushes and acrylic paints. Painting my own design on the shell was easier than I expected, and the matte surface took the paint well.
It’s perfect for customizing a cooler for a team event or just adding a personal touch for outdoor adventures.
Using it on a camping trip, I loved how versatile it was. It holds enough drinks and snacks for a small group, and the flat top was perfect for setting a portable stove.
Carrying it around was a breeze with the ergonomic handle, and I didn’t worry about stains or dirt thanks to the easy-to-clean surface.
Overall, this cooler isn’t just a storage box; it’s a creative, durable outdoor companion. Whether you want to keep things cold for days or customize it to match your style, it checks all the boxes.
What Makes a Cooler Suitable for Painting?
When selecting the best cooler to paint, several key features come into play that enhance the painting experience and outcomes.
- Material: The material of the cooler significantly affects its paintability. Coolers made from high-density polyethylene (HDPE) or similar plastics are often the best options as they allow for better adhesion of paint compared to materials such as foam or metal, which may require special primers.
- Surface Texture: A cooler with a smooth surface is generally easier to paint than one with a textured finish. Smooth surfaces allow for a more even application of paint, reducing the chances of drips or uneven layers, leading to a more professional-looking finish.
- Size and Shape: The size and shape of the cooler can influence the ease of painting. Smaller coolers or those with simple shapes are easier to handle and paint, while larger or more complex designs may require more effort and technique to ensure even coverage.
- Insulation Properties: The insulation material can affect the painting process. Some coolers contain foam insulation that may not be compatible with certain types of paint, potentially causing the paint to bubble or peel. It’s important to choose a cooler where the insulation won’t interfere with the paint adhesion.
- Durability: A cooler that is built to withstand outdoor conditions is ideal for painting. Durable coolers are less likely to chip or scratch easily, ensuring that the paint job lasts longer, especially if the cooler will be exposed to the elements.
- Color and Finish: The original color and finish of the cooler can impact the final outcome of the paint job. Dark colors may require more coats of lighter paint for coverage, while shiny finishes might need sanding or priming first to improve paint adhesion.
What Are the Top Features to Consider When Choosing a Cooler for Painting?
When choosing the best cooler for painting, consider the following key features:
- Insulation Quality: High-quality insulation is crucial as it helps maintain the internal temperature of the cooler, ensuring that paint remains at an optimal working temperature. This feature is particularly important during hot weather, where paint can dry too quickly if not kept cool.
- Portability: A lightweight design with sturdy handles or wheels makes it easier to transport the cooler to different job sites. This is essential for painters who need to move their supplies frequently, helping to reduce fatigue and improve efficiency.
- Size and Capacity: The size of the cooler should accommodate the amount of paint and supplies you plan to store. A cooler that is too small may require frequent refills, while one that is excessively large can be cumbersome to carry.
- Durability: Choose a cooler made from robust materials that can withstand the rigors of a painting job, including exposure to paint splatters and harsh weather conditions. A durable cooler will last longer and provide better protection for your supplies.
- Ease of Cleaning: A cooler with smooth surfaces and removable components simplifies the cleaning process after paint spills or drips. This feature is important for maintaining hygiene and ensuring that no residue affects future paint jobs.
- Additional Features: Look for coolers with extra features like built-in cup holders, tool trays, or compartments for brushes and rollers. These conveniences can enhance organization and make your painting tasks more manageable.
What Are the Best Coolers Recommended for Painting Projects?
When selecting a cooler for painting projects, certain features and functionalities are essential for maintaining optimal paint conditions.
- Igloo 52-Quart Roller Cooler: This cooler is designed for easy transportation and features a spacious interior.
- YETI Tundra 45: Known for its durability, this cooler offers excellent insulation to keep paint supplies at the right temperature.
- Pelican Elite 50 Quart Cooler: With a heavy-duty construction, this cooler is both tough and reliable for outdoor painting projects.
- Coleman 30-Quart Cooler: This budget-friendly option provides decent insulation and portability, making it suitable for smaller projects.
- RTIC 45 Cooler: This cooler is renowned for its quality and performance, keeping your paints safe and temperature-controlled.
The Igloo 52-Quart Roller Cooler is an excellent choice due to its robust design and large capacity, making it easy to carry a variety of painting supplies. Its convenience features, such as built-in wheels and a retractable handle, also make it ideal for transporting to different locations.
The YETI Tundra 45 is highly regarded in the cooler market for its exceptional insulation and rugged build, ensuring that your paint remains at a stable temperature, which is crucial for preventing drying or hardening. Its heavy-duty construction can withstand harsh outdoor conditions, making it a reliable option for professional painters.
The Pelican Elite 50 Quart Cooler stands out for its impressive strength and functionality, designed to keep contents cold for extended periods. This cooler also features a lifetime warranty, emphasizing its long-term durability, which is beneficial for painters who often work on multiple projects.
The Coleman 30-Quart Cooler is a more economical choice that still offers decent insulation and portability. It is lightweight and easy to carry, making it suitable for small painting jobs or for painters who need a simple solution for short trips.
Lastly, the RTIC 45 Cooler is praised for its high-quality construction and excellent insulation capabilities. This cooler is designed to be versatile, accommodating a range of painting supplies while keeping them at optimal temperatures, making it a favorite among serious painters.
How Do You Select the Right Paint for a Cooler?
Selecting the right paint for a cooler involves considering several factors like durability, adhesion, and suitable finish.
- Type of Paint: Choose between spray paint and brush-on paint based on your project’s size and detail requirements.
- Material Compatibility: Ensure the paint you select is compatible with the cooler’s material, typically plastic or metal.
- Weather Resistance: Look for paint that offers UV protection and water resistance to withstand outdoor conditions.
- Finish Type: Decide whether you want a matte, satin, or glossy finish based on your aesthetic preference and usage.
- Non-Toxic Options: If the cooler will be used for food or drinks, consider non-toxic, food-safe paint formulations.
- Color Selection: Opt for colors that reflect sunlight to keep the cooler’s contents cool, or choose vibrant colors for personal expression.
Type of Paint: Spray paint is great for larger areas and provides a smooth finish, while brush-on paint can be better for detailed work. The choice depends on the complexity of the design you plan to apply on the cooler.
Material Compatibility: Different paints adhere better to certain materials; for instance, plastic coolers require paint specifically formulated for plastic to ensure proper adhesion and durability. Always check the paint label for compatibility with the cooler’s surface.
Weather Resistance: Since coolers are often used outdoors, it’s crucial to select paint that can resist harsh weather conditions including rain, sunlight, and temperature fluctuations. Look for paints labeled as weatherproof or outdoor-ready for added protection.
Finish Type: The finish can greatly affect the appearance and functionality of the cooler. A matte finish can hide imperfections but may be harder to clean, whereas a glossy finish is easier to wipe down but may show scratches more easily.
Non-Toxic Options: If the cooler will store food or beverages, prioritize non-toxic paints that are safe for such use, ensuring that no harmful chemicals leach into the contents. Brands that emphasize eco-friendliness often provide safer alternatives.
Color Selection: Light colors can help reflect heat, keeping the contents of the cooler cooler for longer periods, while bold colors can enhance visual appeal. Consider the cooler’s purpose and your personal taste when making your color choice.
What Techniques Ensure a Professional Look When Painting a Cooler?
To achieve a professional look when painting a cooler, several techniques can enhance the final result:
- Surface Preparation: Properly preparing the cooler’s surface is crucial for paint adhesion and durability. This involves cleaning the cooler thoroughly to remove dirt and grease, followed by sanding the surface to create a rough texture that allows the paint to grip better.
- Use of Primer: Applying a primer specifically designed for plastic surfaces ensures that the paint adheres well and provides a uniform base color. A good primer also helps prevent peeling and chipping, enhancing the overall longevity of the paint job.
- Choosing the Right Paint: Selecting high-quality spray paint or acrylic paint suitable for outdoor use can make a significant difference. These paints are formulated to withstand various weather conditions and provide a smooth, professional finish.
- Layering Technique: Applying multiple thin layers of paint instead of one thick coat helps to avoid drips and runs. Each layer should be allowed to dry completely before applying the next, ensuring an even application and a more polished appearance.
- Detailing and Stenciling: Using stencils or painter’s tape can create sharp lines and intricate designs on the cooler. This technique allows for creative expression while maintaining a clean and professional look by preventing paint bleed.
- Finishing Touches: Once the paint is dry, applying a clear sealant or topcoat can add an extra layer of protection and enhance the sheen of the paint. This step not only makes the cooler look more professional but also increases its resistance to scratches and fading.
What Pitfalls Should You Avoid While Painting a Cooler?
When painting a cooler, there are several pitfalls to avoid for the best results:
- Not Cleaning the Surface: Failing to thoroughly clean the cooler before painting can lead to poor adhesion and uneven paint application. Dust, dirt, and grease can interfere with the paint’s ability to stick, resulting in peeling or chipping over time.
- Using the Wrong Type of Paint: Choosing a paint that is not suitable for plastic or the specific material of your cooler can cause the finish to degrade quickly. It’s important to use paint that is designed for outdoor use and can withstand exposure to UV rays and moisture.
- Skipping Primer: Not applying a primer before painting can result in a less vibrant color and a shorter lifespan for the paint job. Primer helps to create a smooth base and enhances adhesion, making the paint look more uniform and lasting longer.
- Ignoring Ventilation: Painting in a poorly ventilated area can pose health risks due to inhaling fumes and can also affect the drying process. Proper ventilation helps in drying the paint evenly and minimizes the risk of inhaling harmful chemicals.
- Overloading with Paint: Applying too thick a coat of paint can lead to runs, drips, and an uneven finish. It’s better to apply several thin layers, allowing each to dry before adding more, which will result in a smoother and more durable finish.
- Neglecting to Seal the Paint: Failing to apply a clear sealant after painting can leave your cooler vulnerable to scratches and fading. A sealant protects the paint from UV damage and helps maintain its appearance over time.
- Pushing for Quick Drying: Rushing the drying process by using heat sources can lead to bubbling or distortion of the paint. It’s best to allow the cooler to air dry naturally in a controlled environment for the best finish.
How Can You Personalize Your Cooler Through Creative Painting Ideas?
There are several creative painting ideas to personalize your cooler, making it unique and reflective of your personality.
- Custom Designs: Create your own artwork, using stencils or freehand techniques. This allows for complete personal expression, whether you want to showcase a favorite quote, intricate patterns, or themed illustrations that resonate with your interests.
- Themed Paint Jobs: Choose a specific theme for your cooler, such as beach, sports, or nature. This helps in creating a cohesive look by selecting colors and images that fit your chosen theme, making it stand out at gatherings or events.
- Use of Decals and Stickers: Incorporate decals or stickers that represent your favorite brands, sports teams, or hobbies. Applying these can add dimension and personality to your cooler while ensuring that you can easily change or update your style as your interests evolve.
- Color Blocking: Utilize bold, contrasting colors to create a color-blocked effect. This modern and stylish approach can make your cooler pop and can be done using painter’s tape to delineate sections before painting.
- Nature-Inspired Designs: Draw inspiration from nature by painting floral patterns, landscapes, or animal motifs. These designs can bring a calming, organic feel to your cooler, perfect for outdoor events or camping trips.
- Glow-in-the-Dark Paint: For a fun twist, use glow-in-the-dark paint to create designs that light up in the dark. This can be particularly useful for nighttime gatherings, ensuring that your cooler remains visible and adds a playful element to your outdoor adventures.
- Personalized Monograms: Adding your initials or a monogram can make your cooler feel uniquely yours. This simple touch can elevate the aesthetic and make it easy to identify your cooler among others.